Quick answer: A backyard vineyard takes three growing seasons before you see a meaningful crop. Year 1 is all roots and one strong trunk – no fruit. Year 2 is structure – training your cordons along the trellis, still almost no fruit. Year 3 is when the vine finally pays you back with its first real harvest. Rush those first two years and you pay for it in weak vines and small crops for years to come. Get them right, and the vine will produce reliably for decades.
What follows is the honest year-by-year picture, grounded in what UMN Extension, Cornell and other land-grant universities teach.
- Grape Variety Finder – match cold-hardy varieties to your zone
- Vineyard Pruning Calendar – exact timing by zone
- Will My Grapes Ripen? – GDD calculator for your location
Year 1: Build the Vine, Not the Fruit
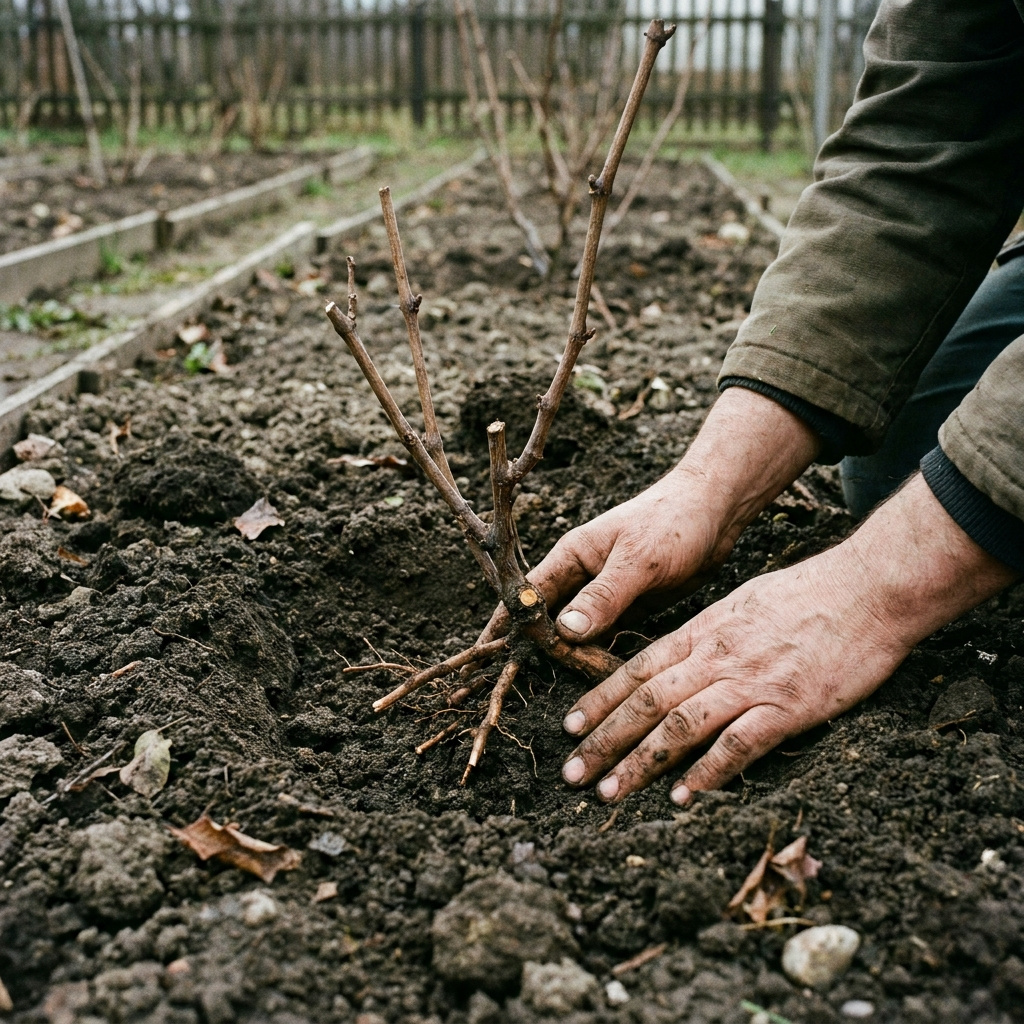
Your single job in year one is to establish a deep root system and train a single, strong vertical trunk. That’s it. Plant dormant bare-root vines in early spring – once the soil can be worked but while the vine is still dormant. Soil preparation matters: good drainage, pH around 6.0-6.5, and ideally a south- or southwest-facing slope for maximum sun and cold-air drainage.
Once planted, drive a sturdy stake – 5-6 feet (1.5-1.8 m) tall – right beside the vine. When new shoots emerge, select the single strongest, most upright shoot and tie it loosely to the stake every 6-8 inches (15-20 cm) as it grows. Remove every competing shoot that comes up from the base. Yes, all of them. This feels brutal when you want the vine to grow. But a vine that’s sending energy into five different shoots in year one builds five weak stems instead of one strong trunk.
Remove any flower clusters that appear in year 1. A young vine that’s allowed to set fruit will pour its energy into those grapes instead of into roots and trunk. University of Minnesota Extension is clear on this point: suppressing the crop in years 1 and 2 results in stronger vines and better long-term yields. It’s not rewarding to pinch off your first little cluster, but do it anyway.
Keep the vine watered during dry spells, especially the first summer. Weed aggressively within 2-3 feet (0.6-0.9 m) of the trunk – weeds compete for moisture and nutrients right where your young vine needs them most. As the growing season winds down, if you’re in Zone 5 or colder, consider winterizing the young vine – mounding soil around the base or wrapping the trunk to protect against hard freezes.
End of Year 1: What You Should See
- One straight, pencil-thick-or-better trunk, 3-5 feet (0.9-1.5 m) tall
- No fruit, no cordons – just one strong stem
- A root system that’s been growing all season underground
Year 2: Build the Structure
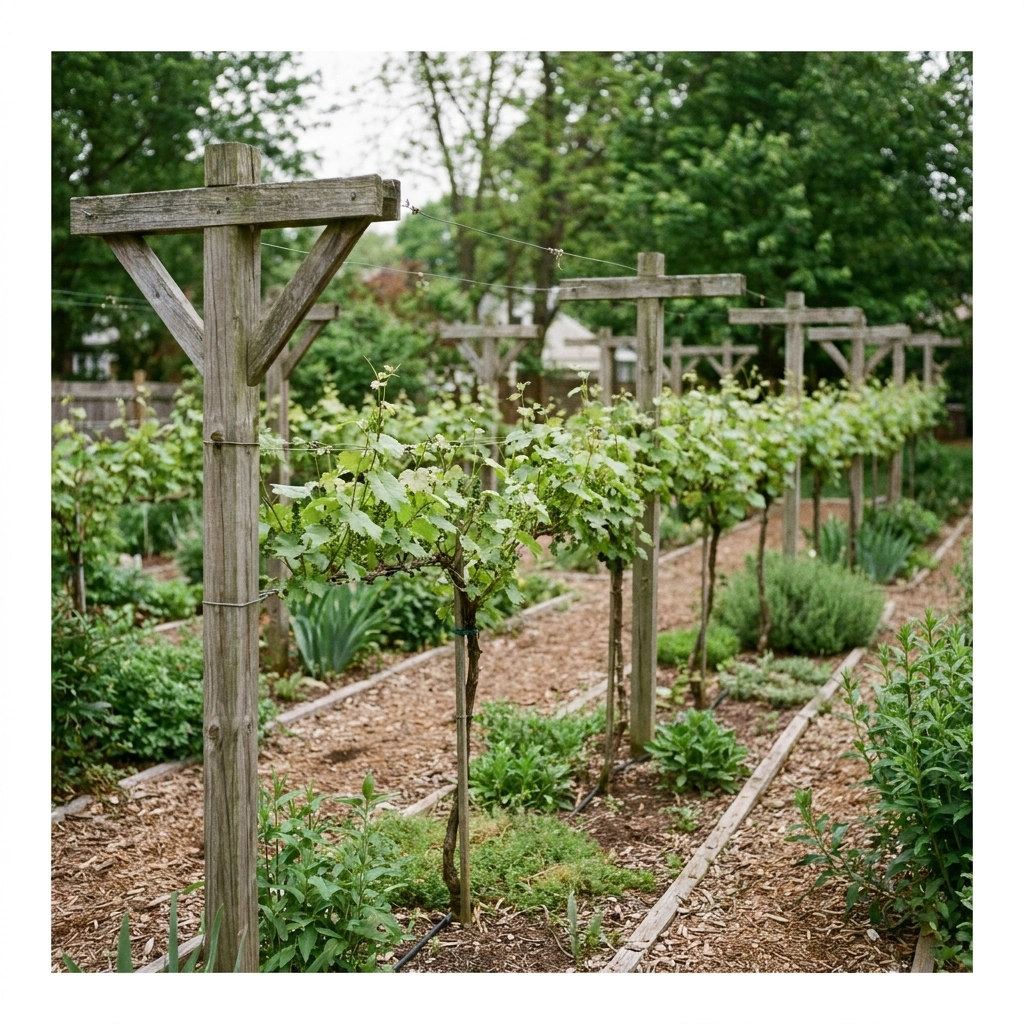
By spring of year 2, your vine should be ready to reach the trellis wire. Most home vineyards run a two-wire trellis: a lower wire around 30-36 inches (75-90 cm) high and an upper wire at 5-6 feet (1.5-1.8 m). Cornell Cooperative Extension recommends this double-curtain or vertical shoot positioning system for most backyard situations. (Not sure which trellis system fits your situation? The linked guide walks through the options.)
When the vine breaks dormancy in spring, select the two strongest lateral shoots near the top wire and train them horizontally in opposite directions along the wire – these become your cordons, the permanent arms of the vine. Tie them gently with soft ties as they grow. Remove shoots growing downward or in unhelpful directions. This is the permanent skeleton your vine will carry for the rest of its life, so take your time getting the cordons positioned well.
Some growers choose cane pruning instead of cordon-trained spur pruning – if that’s your plan, read the comparison here before you commit. The structure you establish in year 2 determines which pruning style you’ll use going forward.
Again this year: remove most or all of the flower clusters. You can allow a very light crop – maybe a cluster or two per vine – if the vine looks extremely vigorous, but the default should be zero fruit. Cornell Extension’s guidelines for young vines emphasize that carrying a full crop too early stunts the vine’s long-term development.
End of Year 2: What You Should See
- Two cordons trained along the top wire, each 12-24 inches (30-60 cm) long (they may not reach full length yet – that’s fine)
- Little or no fruit
- Established trellis system
- A vine ready to carry its first real crop next year
Year 3: Your First Real Crop
This is the year you’ve been waiting for. By spring of year 3, the vine should have full cordons along the trellis wire, a well-established root system, and the structure to carry a modest crop. Now your annual vineyard management cycle begins in earnest.
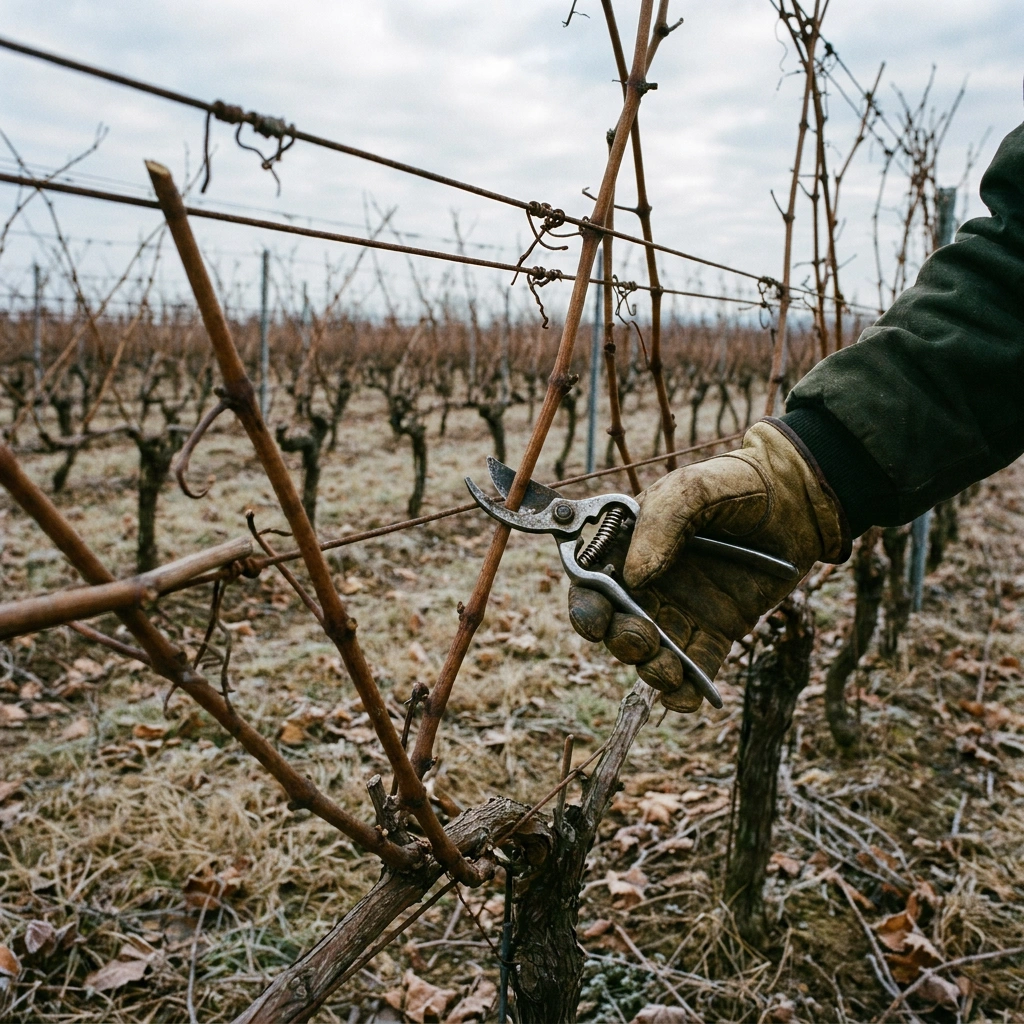
Dormant pruning happens in late winter – after the risk of the coldest temperatures has passed but before the buds swell. In Zone 4-5, that typically means February through early April. This is your most important vineyard task all year. Grape pruning removes 70-90% of the previous year’s cane growth. Yes, that much. The goal is to leave a controlled number of buds that the vine can ripen to full maturity. Overcropped vines produce mediocre fruit and struggle the following year.
In year 3, don’t overcrop. A vine carrying its first real harvest should carry roughly one cluster per shoot – fewer if the vine still looks on the small side. Oregon State University Extension notes that growers who push too hard in the third leaf often regret it in years 4 and 5 as their vines recover from the stress. Better to have a small, quality first harvest than to tax the vine.
The Year 3 Season at a Glance
- Late winter (February-March): Dormant prune – remove most cane growth, leave 2-4 buds per spur
- Spring (April-May): Shoots emerge; thin shoots to one per spur; position shoots upward in the trellis wires
- Early summer (June): Begin disease management – downy mildew and powdery mildew pressure peak here
- Midsummer (July): Shoot tipping and leaf removal in the fruit zone to improve air circulation
- Late summer (August-September): Monitor Brix levels – harvest when ripe for your variety and use
- Fall (October): Winter preparation – depending on your zone and variety, consider cane burial or crown protection
Year 3+ and Beyond: The Annual Cycle
Once your vine reaches full production – usually year 4 or 5 – the annual calendar repeats. The principles don’t change; you just get better at reading the vine.
Dormant Pruning (Late Winter)
This is the cornerstone of vineyard management. Walk the rows in late February or March (Zone 5 timing; adjust by zone), cut out the old fruiting canes, and leave your renewal spurs or replacement canes depending on your system. The vine should look almost bare after pruning – that’s correct. Underpruned vines are one of the most common home-vineyard mistakes. The full pruning guide here walks through spur pruning vs. cane pruning with photos.
Shoot Thinning and Positioning (Spring)
As shoots emerge in spring, thin to one per spur and tuck them upward between the trellis wires. Good canopy management – keeping shoots vertical and evenly spaced – is the difference between a disease-prone thicket and a well-aired vineyard. Spacing shoots roughly 4-6 inches (10-15 cm) apart gives each leaf the sun it needs and lets air move through after rain.
Disease and Canopy Management (Summer)
Cold-climate growers in zones 4-6 deal with downy mildew, powdery mildew, and botrytis as the primary disease pressures. Hybrid varieties like Marquette, Frontenac, and Itasca have good disease resistance, which reduces – but doesn’t eliminate – spray programs. Even resistant varieties benefit from leaf removal in the fruit zone to improve airflow and reduce botrytis risk in August. A simple organic copper spray at key phenological stages covers the residual risk for most home growers.
Harvest (Late Summer-Fall)
Don’t harvest by calendar. Harvest by Brix. A $25 refractometer is the most useful tool in the home vineyard. Most cold-hardy reds for wine are ready at about 22-26 °Brix (Frontenac and Marquette often reach the upper 20s – taste and follow variety-specific guidance, don’t pick at 21 just because it’s “ripe”); whites and rosés typically 18-22 °Brix depending on the variety. Taste as you measure – Brix alone doesn’t capture flavor maturity, but it’s your best objective starting point.
Winter Protection (Fall-Early Winter)
Whether you need to protect your vines in winter depends entirely on your zone and variety. Truly cold-hardy hybrids (Frontenac, Marquette, La Crescent) are bred to survive Zone 3-4 winters without protection. In Zone 5-6, most hybrid varieties come through fine on their own. If you’re growing European vinifera varieties (Cabernet, Riesling, Chardonnay) in Zone 5 or colder, you’re fighting the odds every winter – that’s a different and much harder project. The winter protection guide here covers the full range of options, from minimal mulching to full cane burial.
The Patience Play
Three years is a long time to wait for a harvest. There’s no pretending otherwise. But rushing it – keeping some clusters in year 1, skipping the structure work in year 2 – is the classic route to weak vines, inconsistent crops, and sometimes a replant a few years in.
The vineyard that gets years 1 and 2 right – one trunk, no fruit, real structure – hits its stride in year 3 and produces reliably for 20, 30, sometimes 50 years. That math makes the early patience easy to justify. Put the work into the root system and the framework, and the vine will reward you far longer than any shortcut would have.
If you want a walkthrough companion as you go through these stages, the starting a vineyard guide here covers site selection and first-year setup in more detail, and the vine spacing guide will help you plan your layout before you dig the first hole.
Frequently Asked Questions
How long does it take before a grapevine produces fruit?
Most grapevines take three growing seasons to produce their first meaningful crop. Years 1 and 2 should be crop-free – the vine needs that time to establish roots and build its permanent trunk and cordon structure. Attempting to harvest in years 1 or 2 typically weakens the vine and delays productive maturity. By year 3 you can expect a light but real harvest; full production usually arrives in years 4-5.
Should I remove flower clusters in the first year?
Yes, absolutely. University of Minnesota Extension recommends removing all flower clusters in year 1 – and most in year 2 – so the vine directs its energy into root development and trunk growth rather than fruit production. A vine allowed to fruit too early rarely catches up to one that was properly established.
What are cordons and when do I train them?
Cordons are the permanent horizontal arms of the grapevine that run along the trellis wire. You train them in year 2 by selecting two strong lateral shoots near the top wire and tying them horizontally in opposite directions. They become the framework from which fruiting spurs or canes grow every year going forward. Training cordons correctly in year 2 is one of the most important structural decisions you’ll make for the vine’s lifetime.
How much should I prune a mature grapevine each year?
A mature grapevine should be pruned back aggressively each dormant season – typically 70-90% of the previous year’s cane growth is removed. This sounds extreme but it’s correct viticulture. The vine’s tendency is to overbear; pruning controls the crop load so the vine can ripen what it carries to full maturity. Underpruned vines are one of the most common mistakes in home vineyards.
Can I grow grapes in Zone 4 or Zone 5?
Yes – with the right varieties. Cold-hardy hybrid grapes like Marquette, Frontenac, Frontenac Gris, La Crescent, Itasca, and Petite Pearl are specifically bred for Zones 3-6 and survive winter temperatures down to -30 °F (-34 °C) or colder. Traditional European vinifera varieties (Cabernet Sauvignon, Chardonnay, Pinot Noir) are not reliably winter-hardy below Zone 6 and are not recommended for northern home vineyards without extensive winter protection. The cold-hardy grape varieties guide covers zone-by-zone recommendations in detail.
🍇 Don’t plant the wrong grape
Vines take years to fruit. Get the free cheat-sheet of varieties that actually survive and ripen in your zone.
By subscribing you agree to our Privacy Policy.